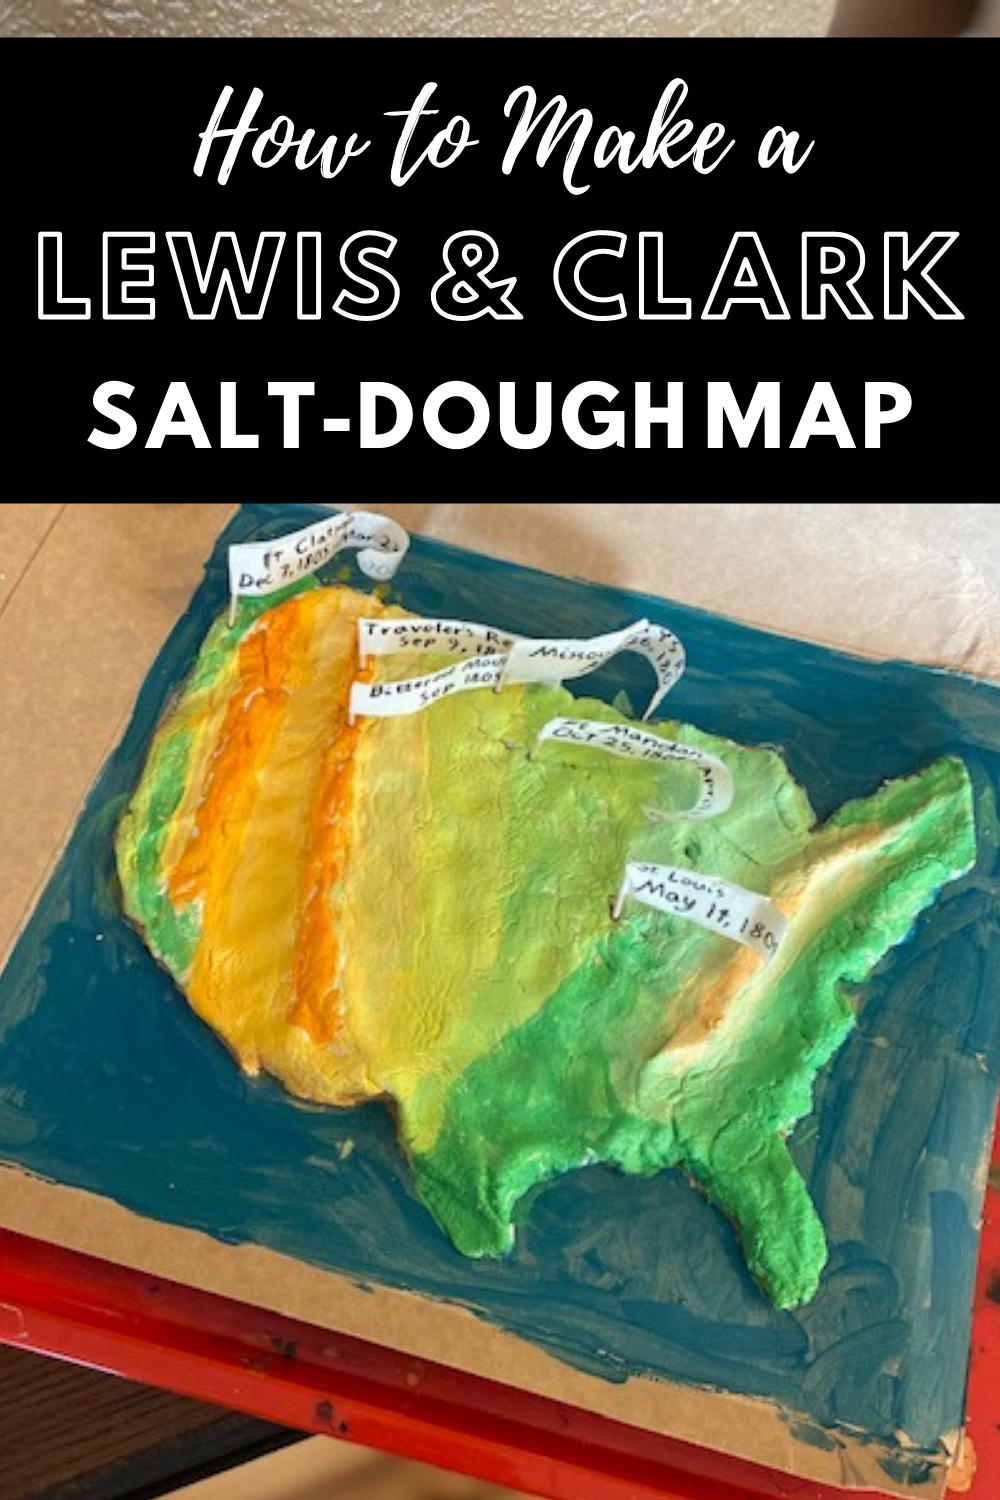
Lewis and Clark Salt-Dough Map
Homeschooling and salt dough maps go together like peanut butter and jelly. They are the ultimate hands-on way to learn geography AND history. But they can also seem like a daunting activity, especially if you are averse to a mess. Have you ever made one? A salt-dough map that is, not a mess! 😉
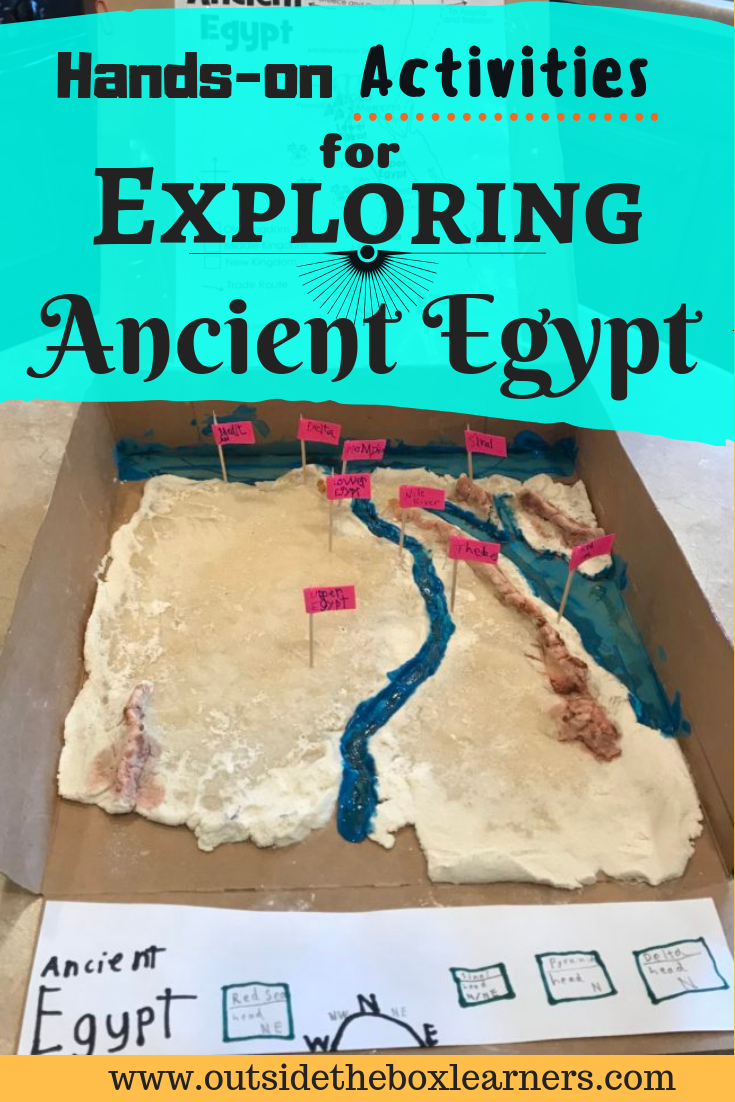
Before I had ever done a salt dough map I had made them out to be much more complicated than they were. Then we did our first salt-dough map while studying Ancient Egypt. It was a wild success!
Recently, while studying Lewis and Clark’s expedition, the thought of doing another salt-dough map seemed like a great idea. We could map out their expedition, even showing the different terrain they had traversed over. And so we made another one! I don’t know why I waited a few years to do another salt-dough map, as they really aren’t that difficult and the kids love them!
This blog post contains affiliate links and any purchases made through such links will result in a small commission for me (at no extra cost to you.)

Here is how we made a Lewis and Clark salt-dough map, using items we had in the house!
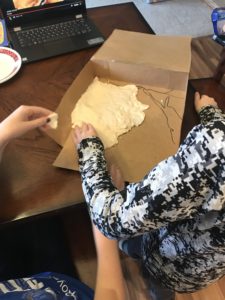
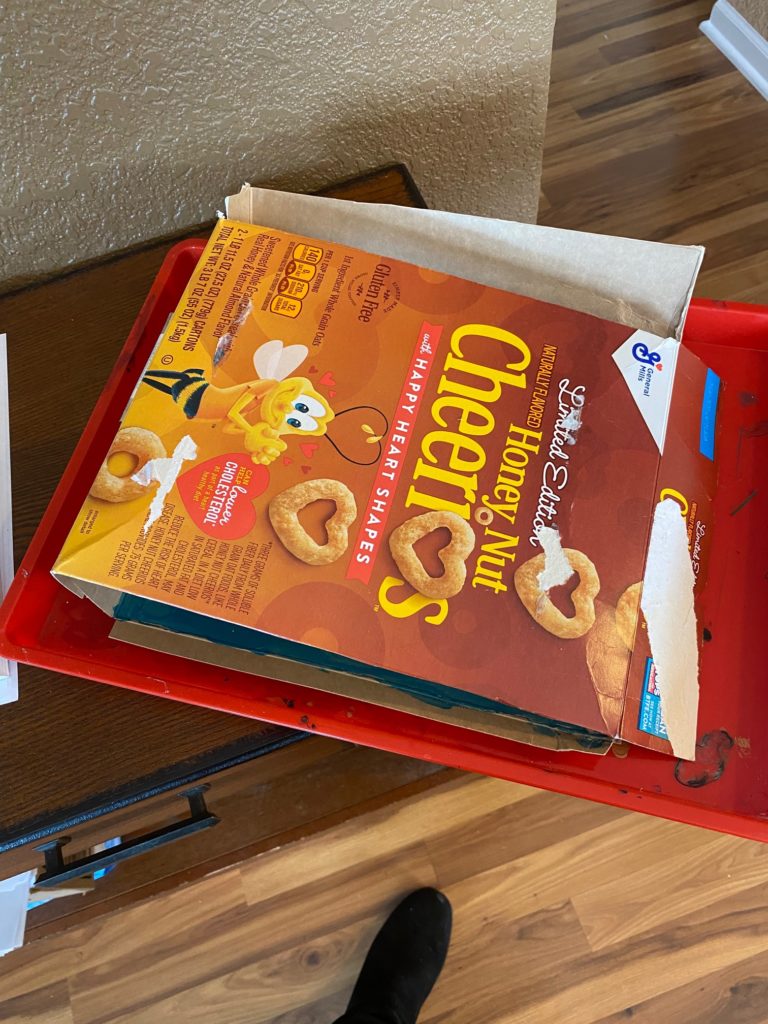
- We needed something for the base. Not overcomplicating things we used a large cereal box and cut an opening flap using a utility knife.
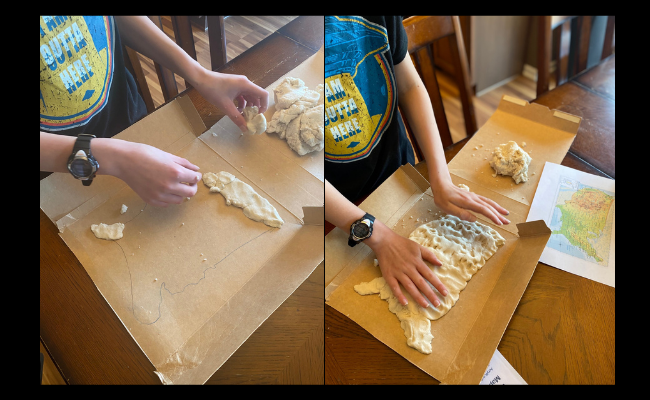
- We went online to find a map of the United States. We printed out the size we wanted (we just did the one-pager!) Then my younger son colored the back of the map using a black piece of chalk. We then flipped it over and traced the outline of the map (we actually traced a little bit beyond the outline of the map, because we wanted it just a tad bigger…). Now we had the outline of the map on the cereal box base! Don’t be like me and overthink this part. It does not have to be perfect!
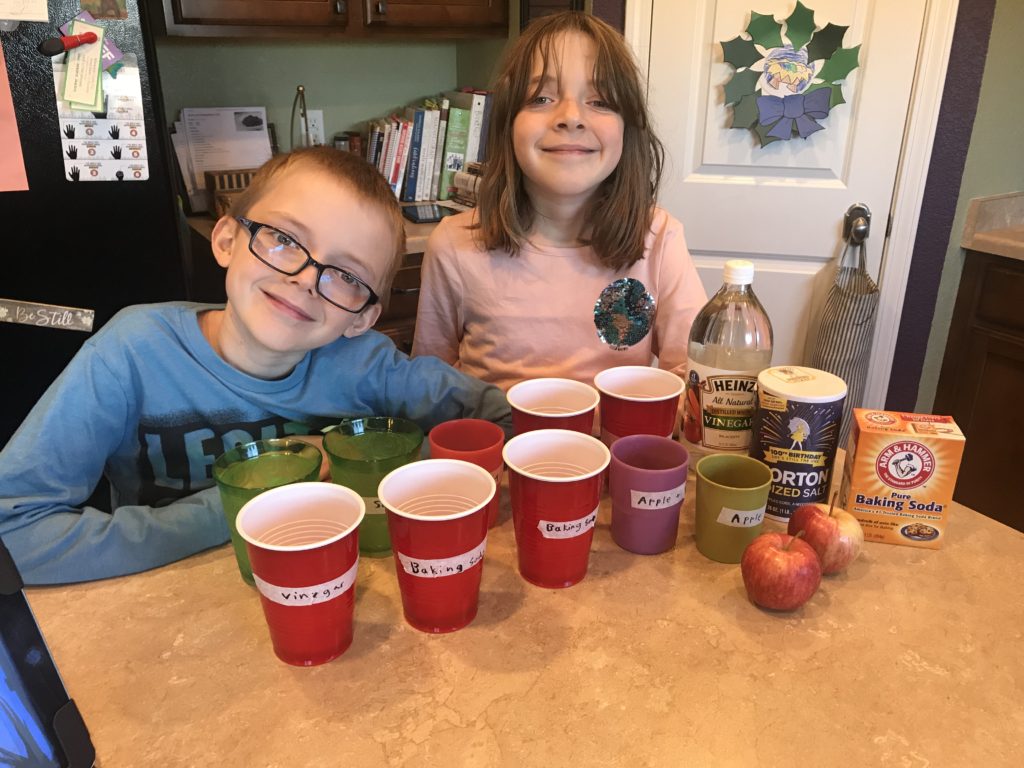
- We mixed up the salt dough: 2 cups flour, 1 cup salt, 1 cup water. (If it’s too sticky you can add more flour; if it’s too dry, add more water). Mix and knead it for a few minutes.
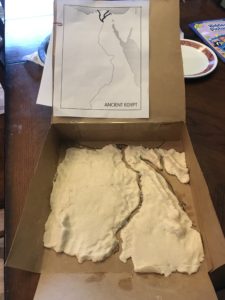
- Now the fun part – spreading the salt dough out to fill in the map, and make sure the mountains were in the right spots. We printed out a physical map to help guide us in how to shape the moutnains, plains and valleys.
- Before letting the map dry, we stuck toothpicks into the main locations we wanted to highlight on the map (we used a timeline from this book to help us pick those locations.) We pulled the toothpicks out right away, but the holes were there for when it dried. We labeled our toothpicks at this time, but you can do it later too.
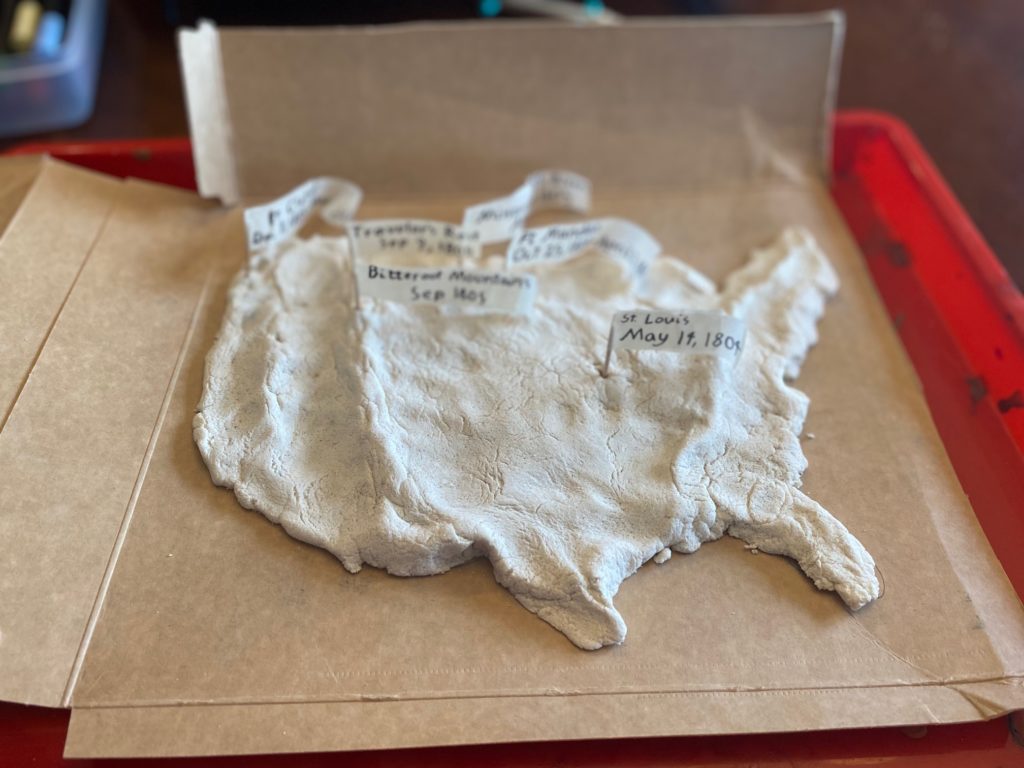
*Then we let it air dry for 48 hours.*
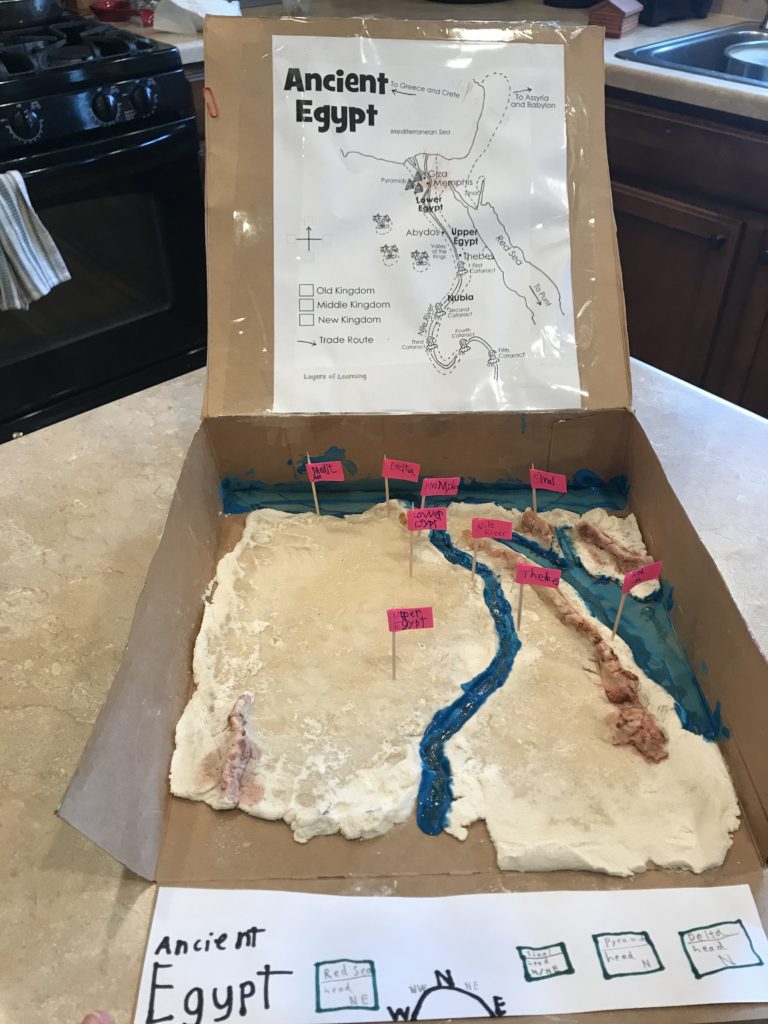
6. Next we painted the map. We used the same physical map of the U.S. (linked above) to help guide us in how to paint it. 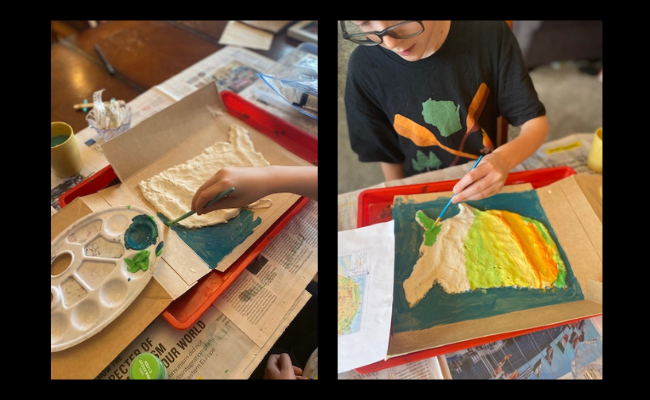
7. We then stuck our labeled toothpicks back into the salt dough map.![]()
![]() And here’s the final product!
And here’s the final product!